
How to install the App
Search the Custom Order Status App on the App Store. Click on Add App
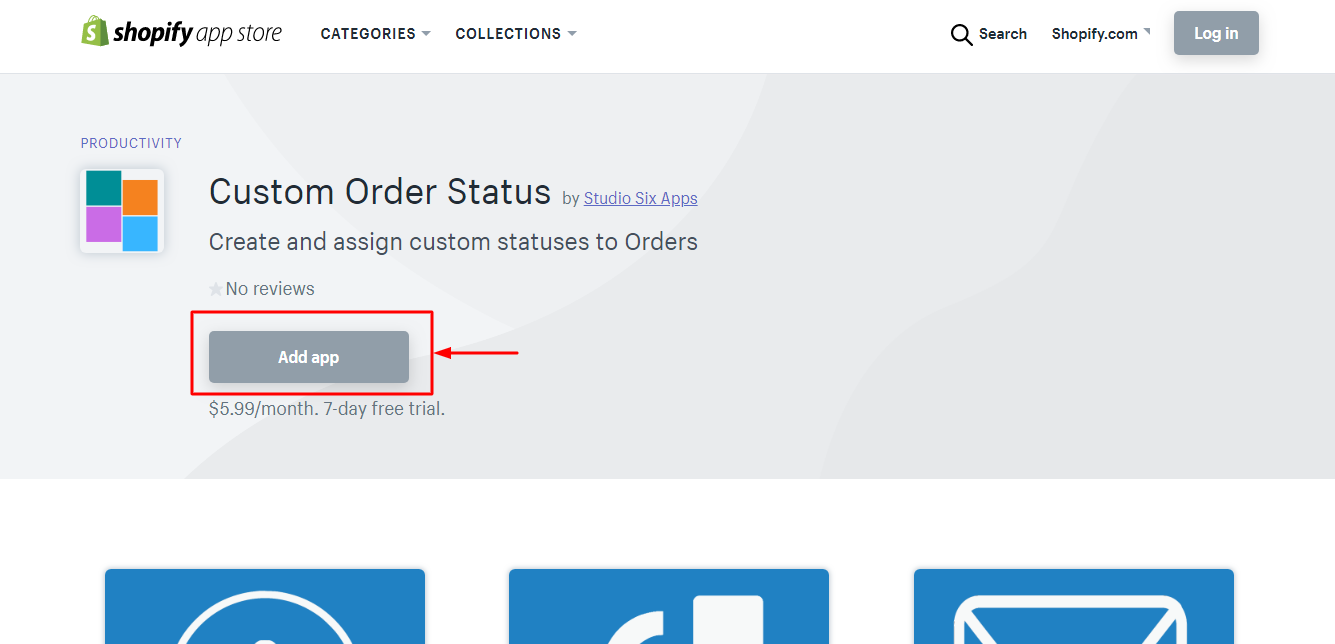
Once you click on Add App you will be shown a page to authorize the App to allow access to the needed permissions for the App to function.
You will then be redirected to the App once access is granted.
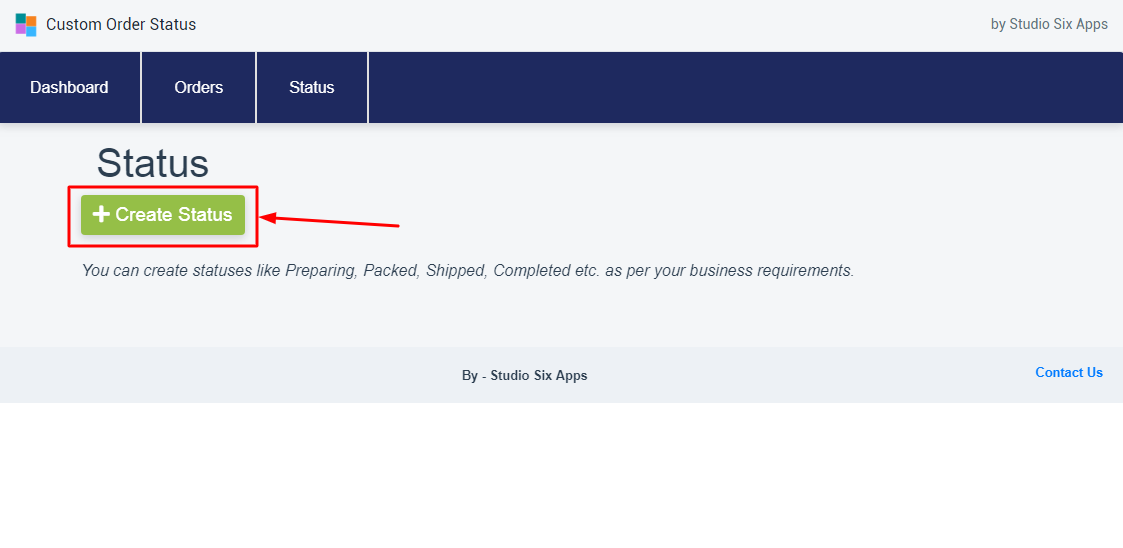
Create Statuses
Once the App is installed, you will be redirected to the Dashboard page of the App. Click on the Status tab to view, add, modify or delete your current statuses. Since the App is newly installed, currently there will not be any statuses present.
Click on the Create Status button to get started.
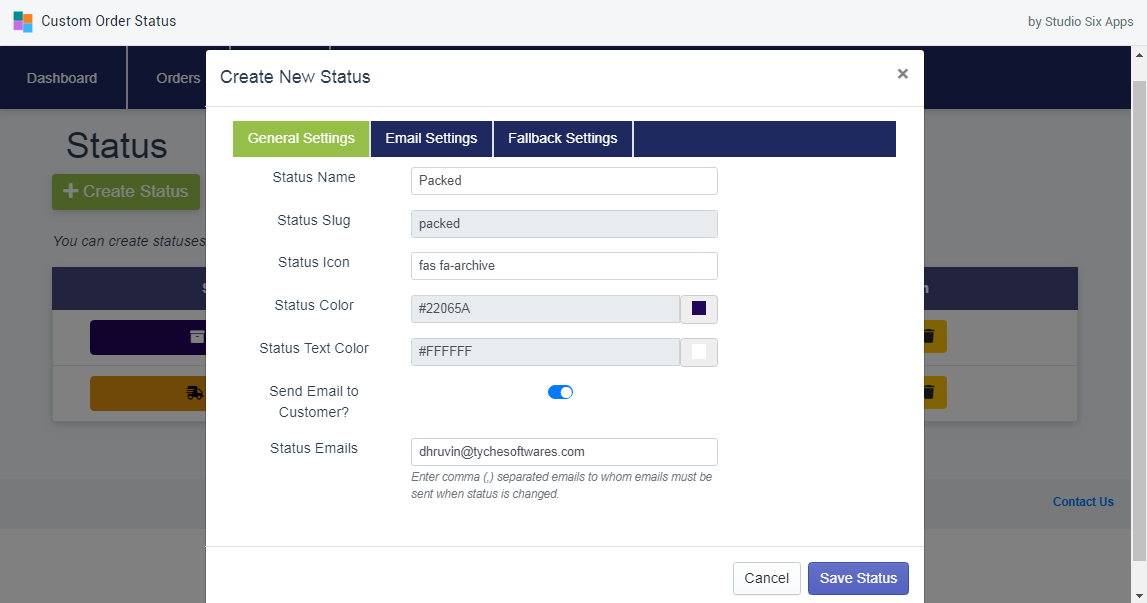
Fill in the details in the General Settings tab. Below is the description of each of the field:
1. Status Name: Enter the name of a status. Examples include ‘Packed’, ‘Preparing’, ‘Shipping’ etc.
2. Status Slug: This will be auto generated based on status name mentioned above.
3. Status Icon: Enter any word you want the icon to represent. Once you do so, recommendations will automatically show up in the field.
4. Status Colour: Select a colour to set to the assigned status.
5. Status Text Colour: Select a colour for the status text.
6. Send Email to Customer?: Turn this setting ON to send emails to the customers when an Order Status is changed.
7. Additional Recipients: Add comma separated emails here to whom emails will be sent once an order status is changed.
Email Settings:
1. From Name: The name to be displayed in the email sent.
2. From Email: The email to be displayed in the email sent.
3. Email Subject: Subject in the email sent.
4. Email Body: Contents of the email sent.

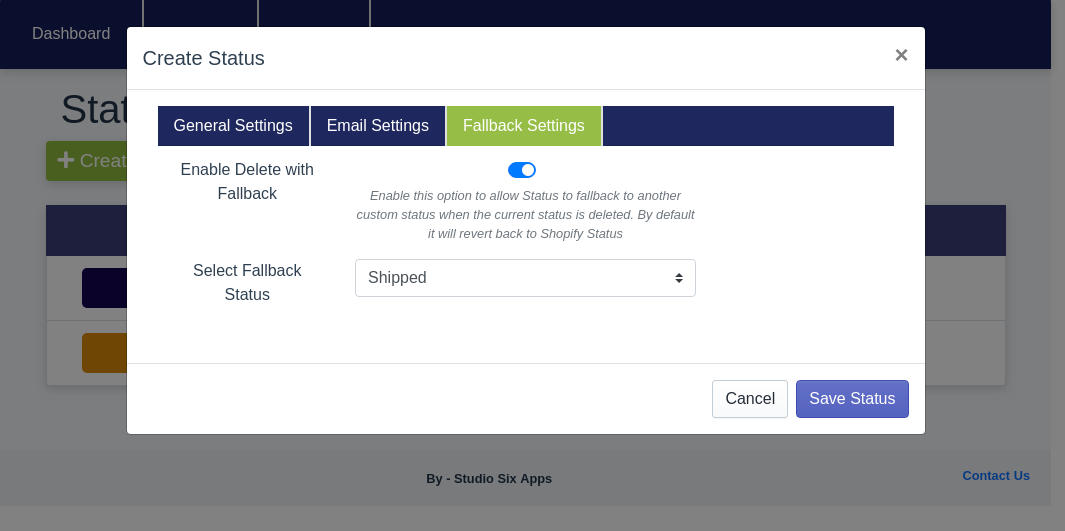
Fallback Settings
1. Enable Delete with Fallback: Enable this option to allow Status to fallback to another custom status when the current status is deleted. By default it will revert back to Shopify Status
2. Select Fallback Status: If the above option is selected, then select a custom status to which the Fallback should happen when the current status is deleted.
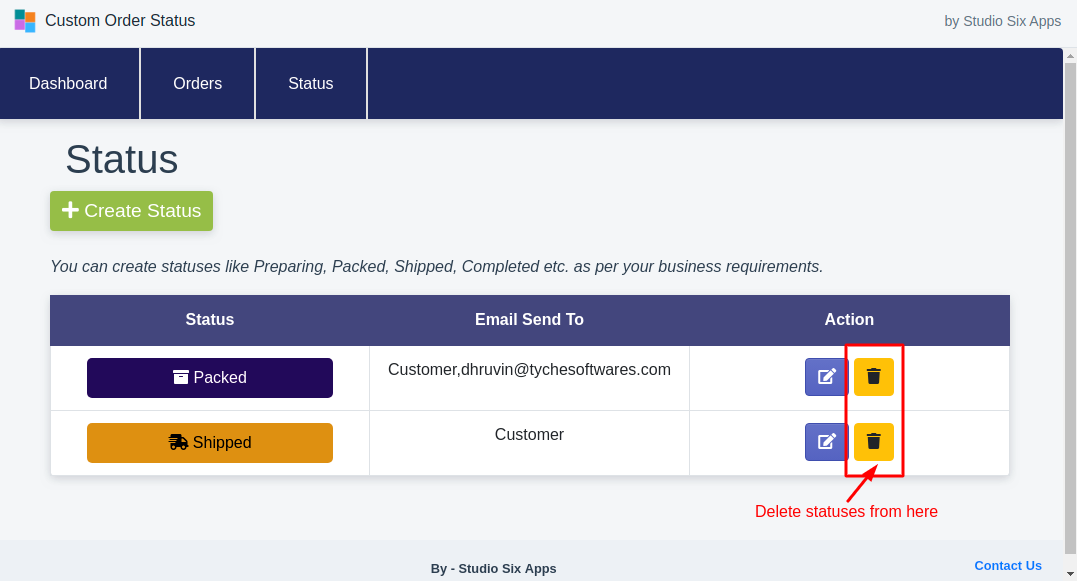
Delete Status
A custom status can be created from the Status tab as shown below:

Once you click on delete icon, a warning will come displaying what will happen in case the status is deleted depending on the fallback settings.
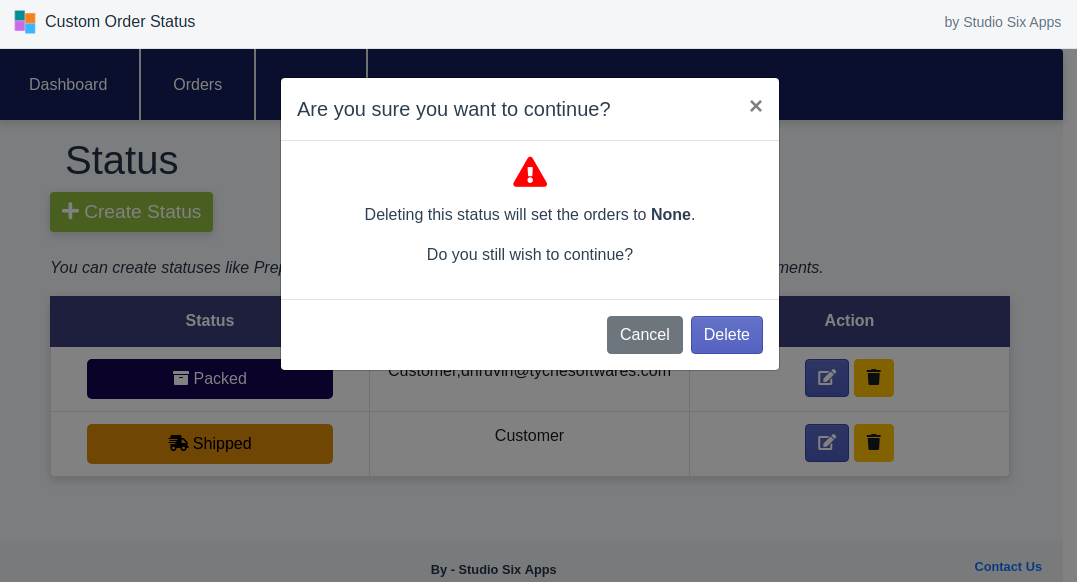
Scenario 1: Fallback Settings not set
When fallback settings are not set, a warning shown below will appear. If you continue, all the Orders set with the current status will be reset to No Status.
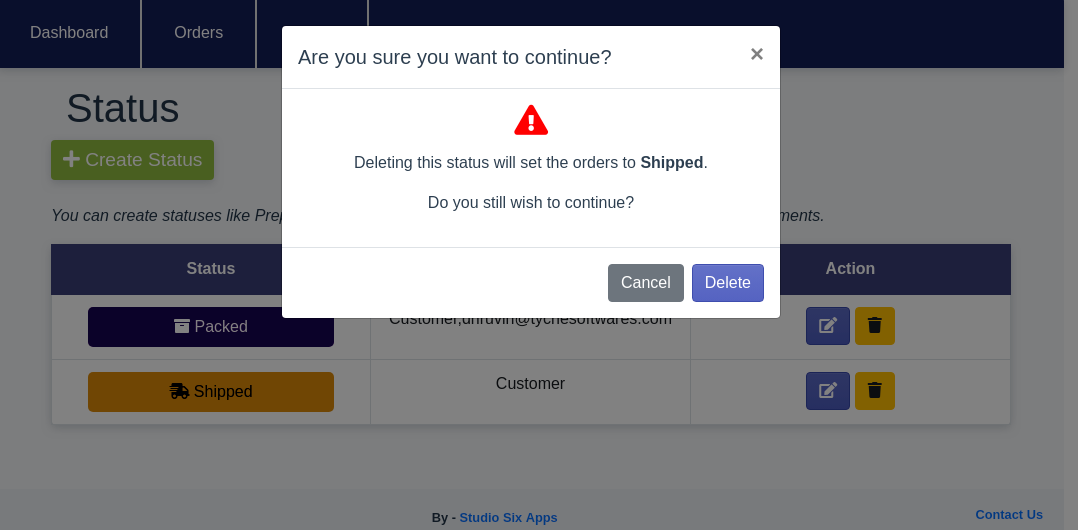
Scenario 2: Fallback Settings set
When fallback settings are available, in those case Order statuses will be automatically changed to the one present in Fallback Settings mentioned in the above section. Here is an example of the same:
Assign Statuses
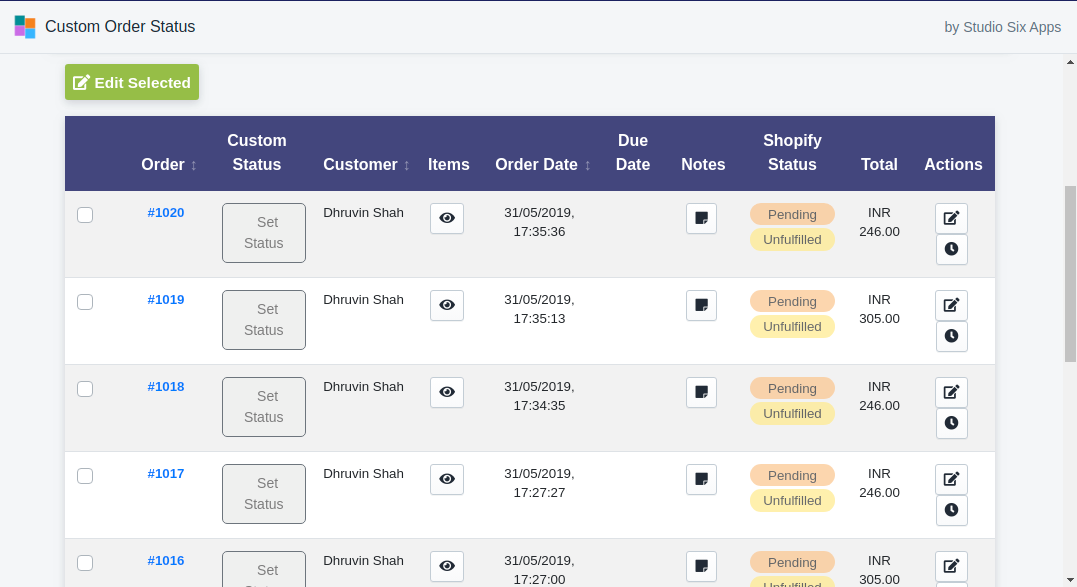
You can assign status from the Orders tab of the App as shown below:
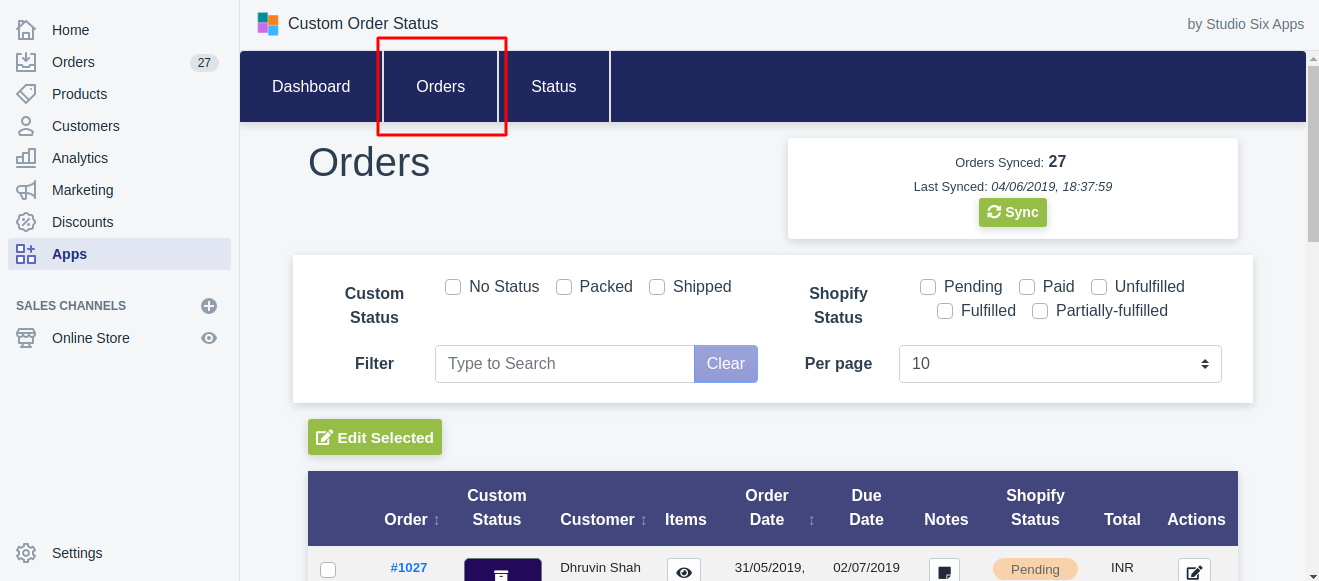
Once you visit Orders tab, the App will try to sync Orders with Shopify. You can also sync orders at any time using the Sync button. By default, the App will pull Orders of the last 60 days.
Once the Orders are synced and available you can now start assigning statuses to these Orders. You can apply status by either clicking on Set Status button or the edit icon present under actions column.
Once you click on Set Status button, popup will appear to add the details as shown below. Input the values as needed and click on Update to update the status. Email will be sent as per the settings saved.
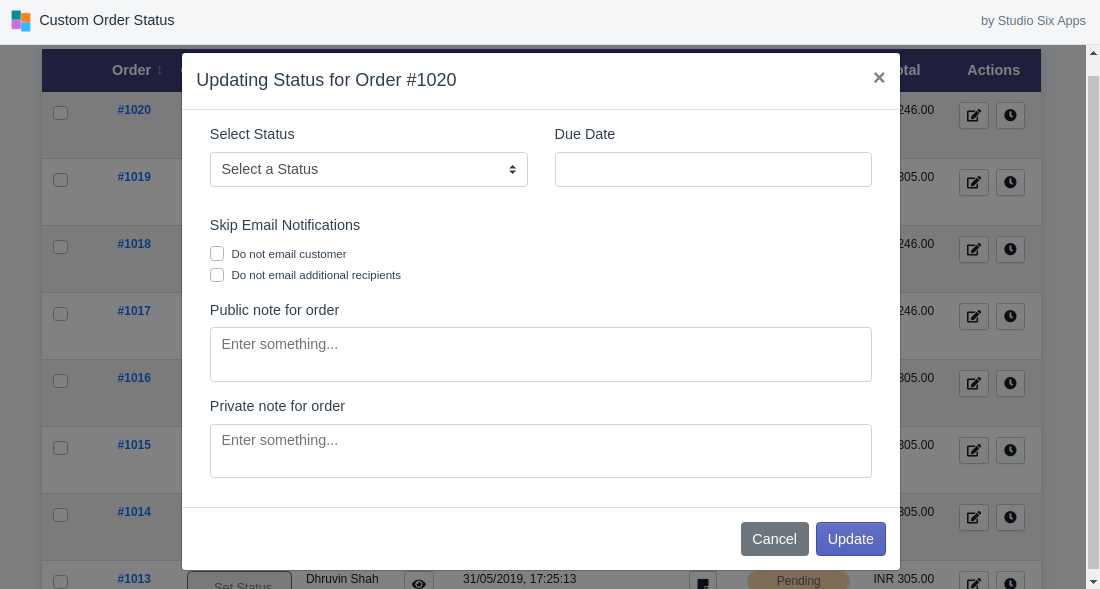
Description of the fields present:
1. Select Status: The status to be updated needs to be selected here.
2. Due Date: You can set a due date for an Order for a particular status.
3. Skip Email Notifications:
a. Do not email customer: When this option is enabled, the status change email configured for this status will not be sent to the customer.
b. Do not email additional recipients: When this option is enabled, the status change email configured for this status will not be sent to additional recipients
4. Public note for order: This note will be sent in the status change email that is intended for customers
5. Private note for order: This note can be used for internal purposes and can also sent in emails.
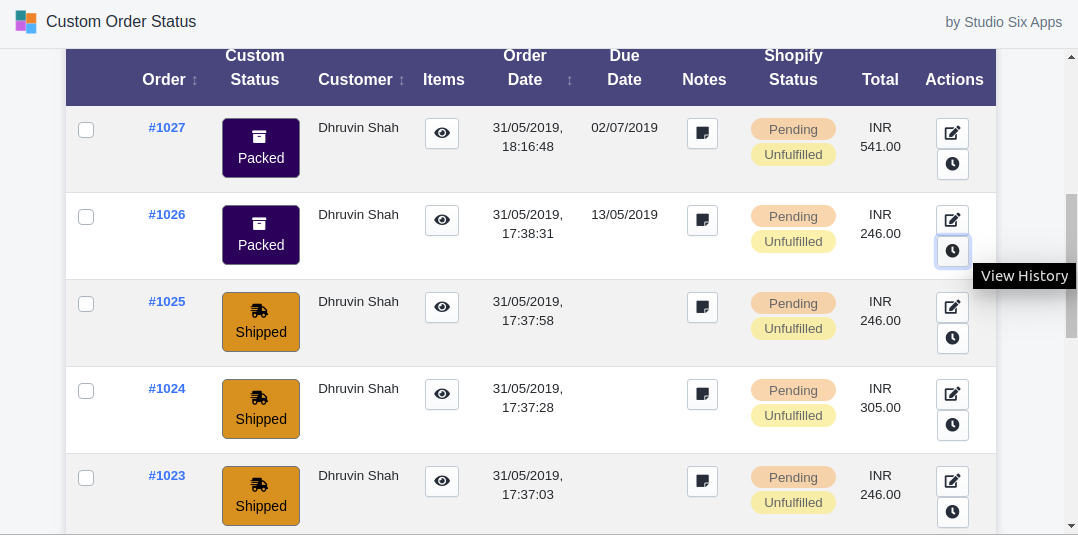
View History
You can view the history of the status changes from History icon here:
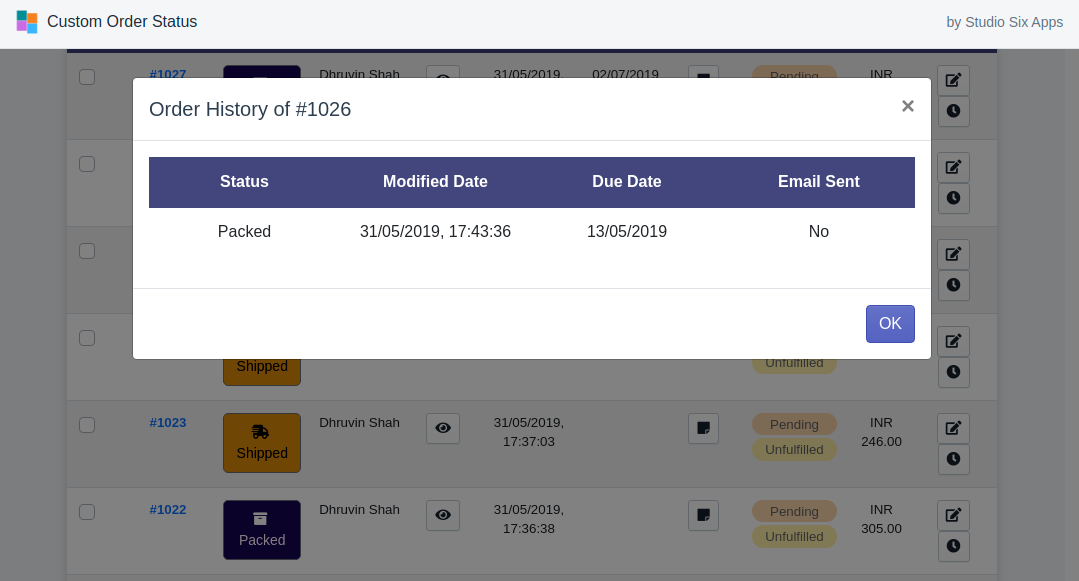
On clicking the icon, status change history can be seen:
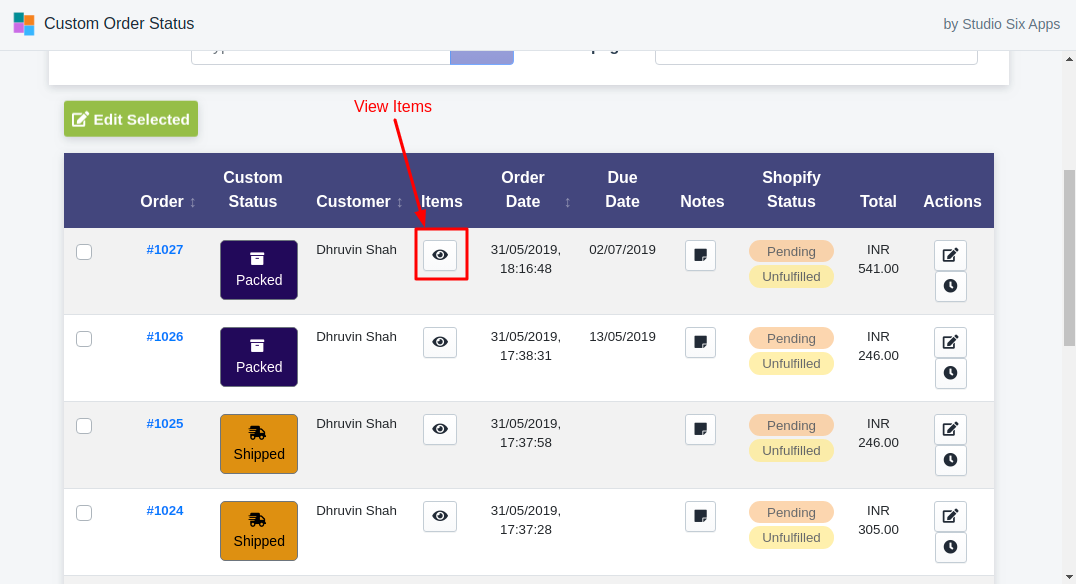
View Order Items
You can view the current items present for an Order by clicking the button under the Items column here:
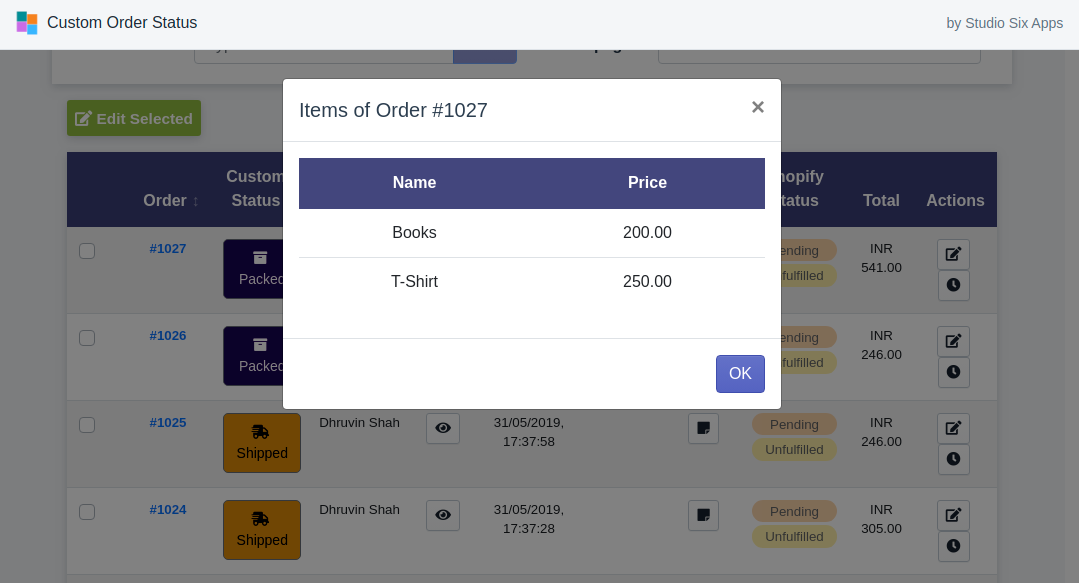
The Items will be displayed in the popup like this:
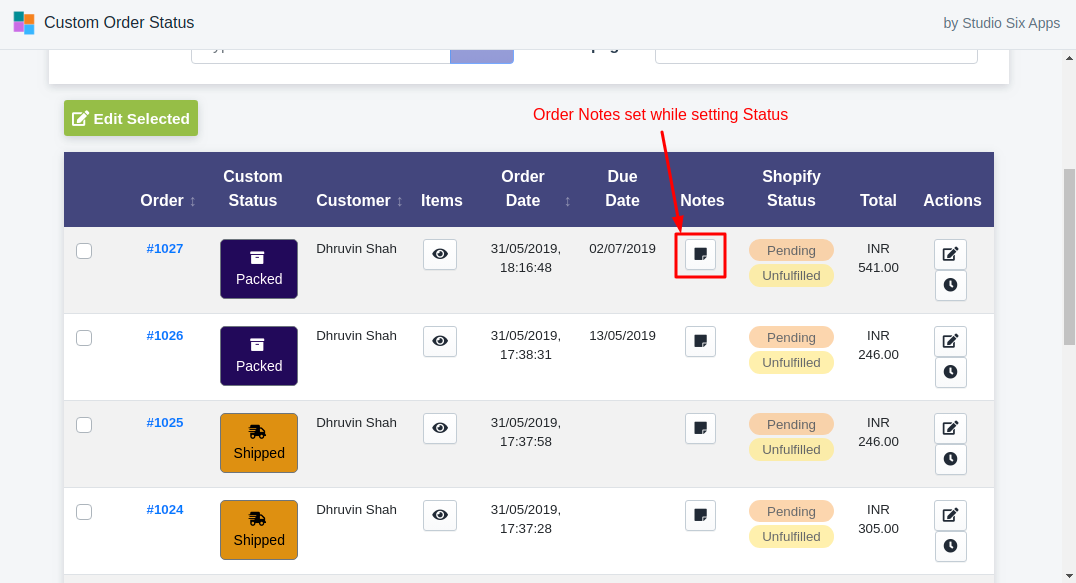
Order Notes
Order notes set while setting statuses can be viewed by clicking the button under the notes column as shown below:
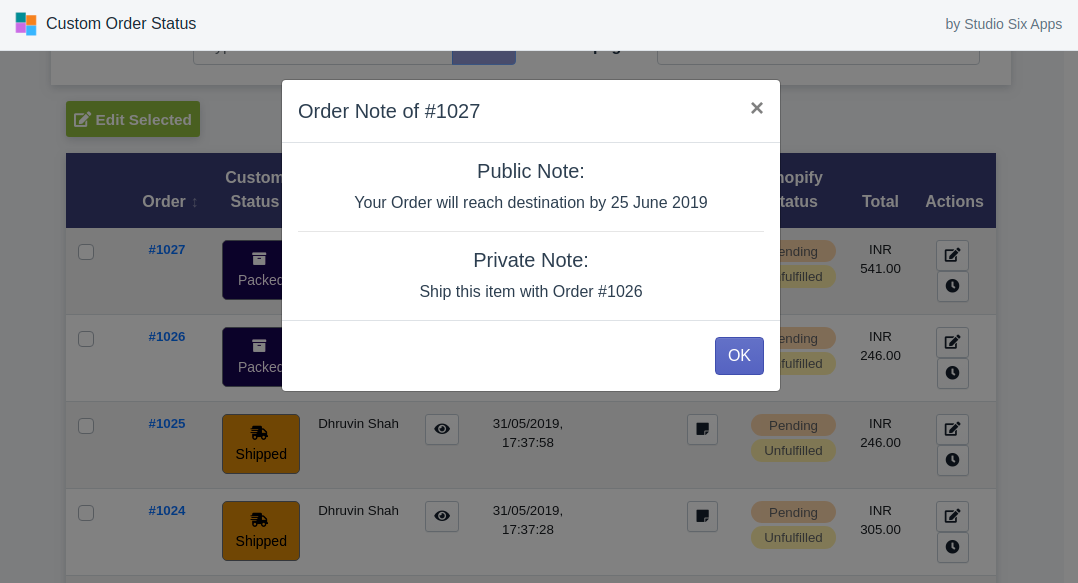
The details will be shown on the popup like this:
Filtering and Sorting
You can sort the Orders based on Order Number, Customer Name or Order Date by clicking on the respective column headers.
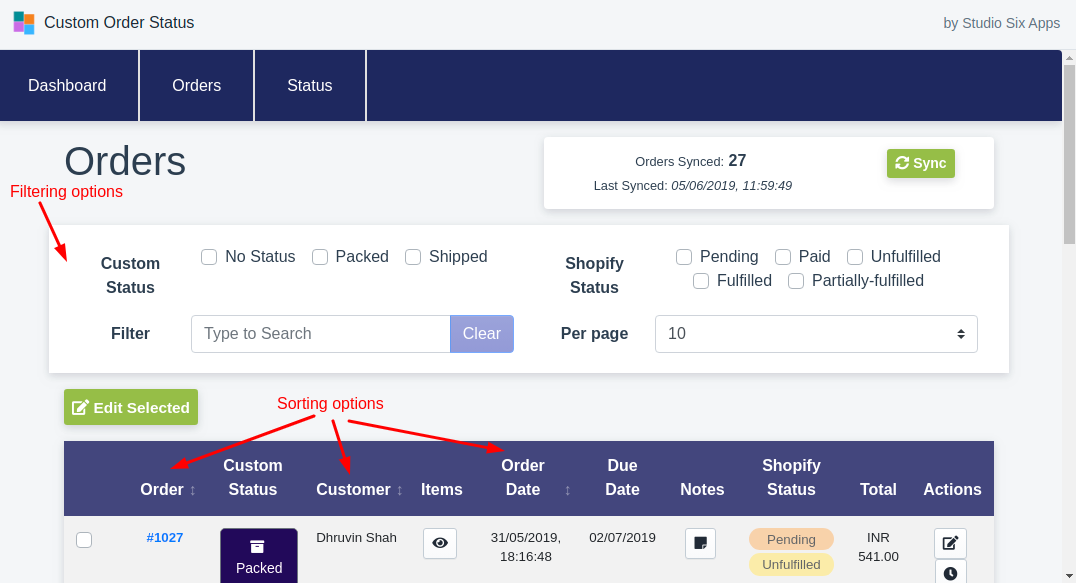
You can also filter based on Custom Order Status or the Shopify Status using the checkboxes shown above.
You can also filter using the textbox field. Enter the values you want to find and the result shall be displayed in the table below.