This guide will help you create a custom delivery schedule for different shipping methods. For example, you can assign specific delivery days, time slots, additional charges, and many other options based on the selected shipping method.
Steps to Create a Custom Delivery Schedule for Shipping Methods #
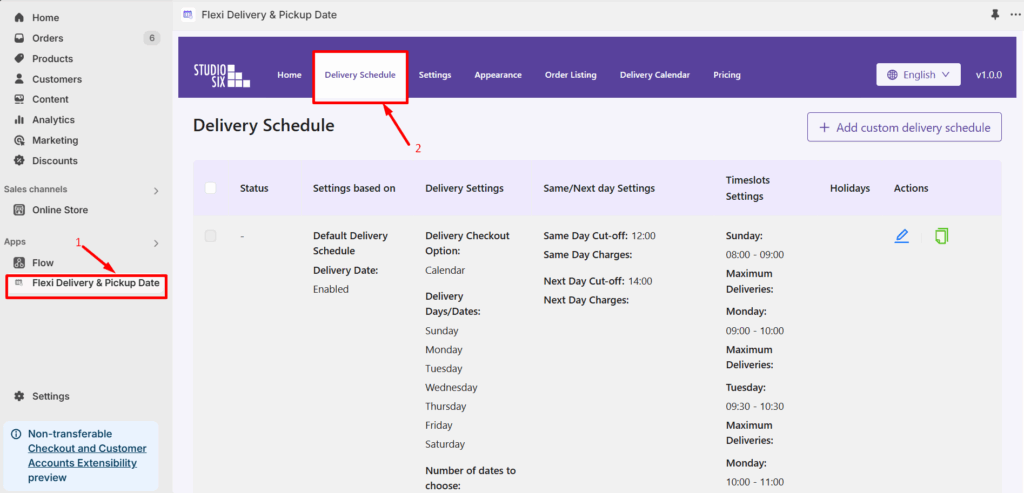
- Go to your Shopify admin dashboard and open Apps > Flexi Delivery & Pickup Date > Delivery Schedule.
- Click on the ‘Add Custom Delivery Schedule‘ button.
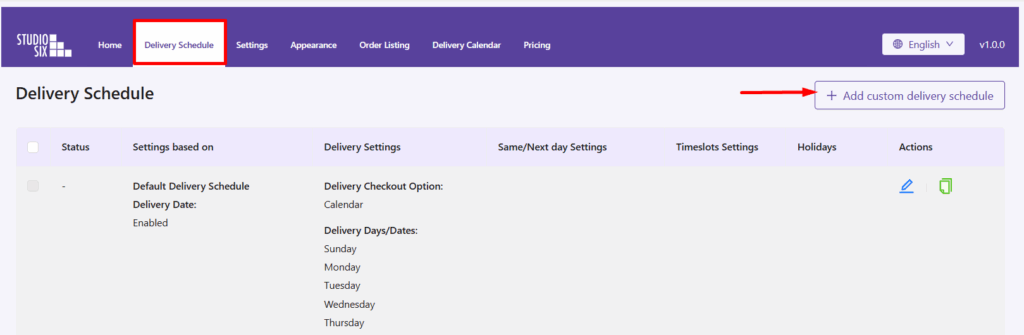
Clicking on “Add Custom Delivery Settings” will open a new page with different options for configuration.
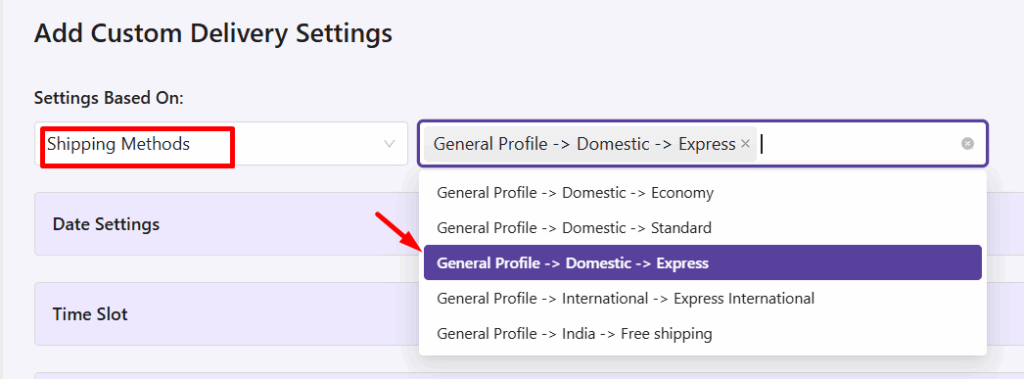
- Under “Settings Based On”, choose Shipping Method from the dropdown. Once selected, a new field will appear beside where you can choose from the available Shipping methods.
Following this, use the different dropdowns such as Date, Time, Holiday Settings, etc to enter all your delivery requirements.
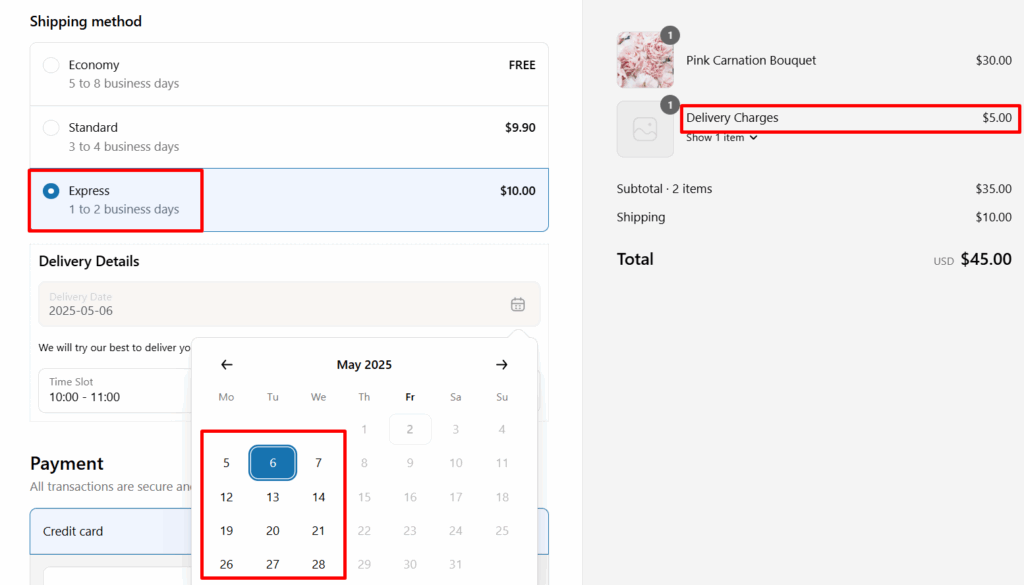
- For example, under ‘Date Settings’, you can enable Mondays, Tuesdays, and Wednesdays, and add a $5 extra charge.
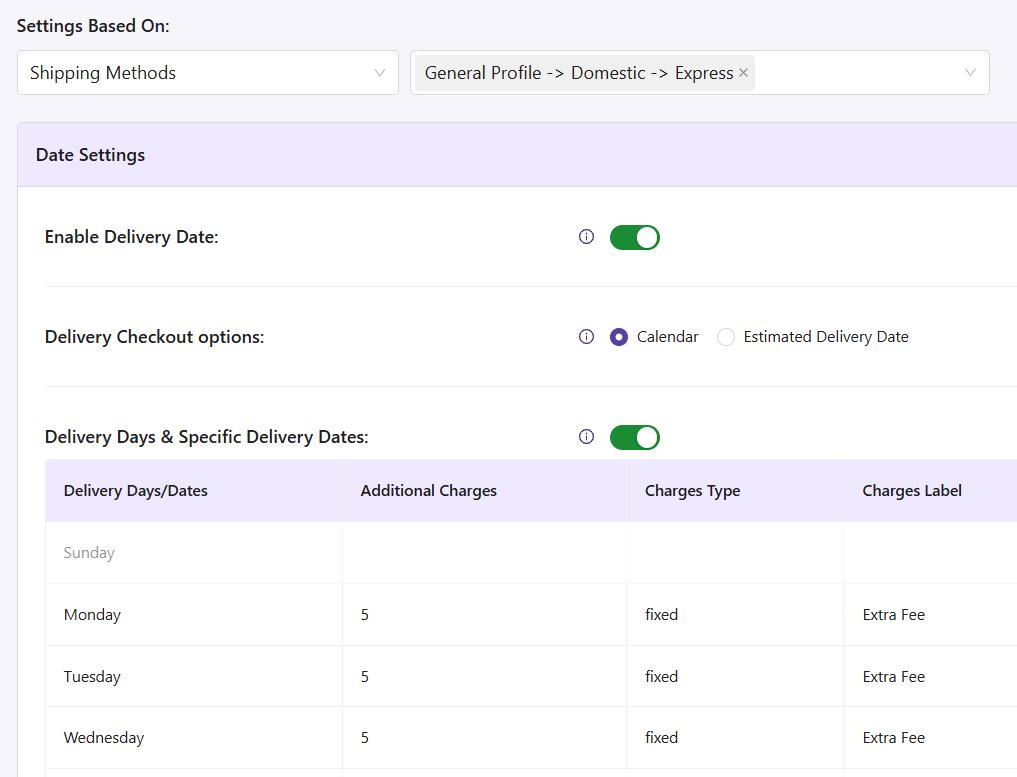
In this way, we’ll add all the other individual settings as required from other dropdowns like Date Settings, Time Settings, Weekdays, Holidays, etc.
- Click on the ‘Save Settings’ button.
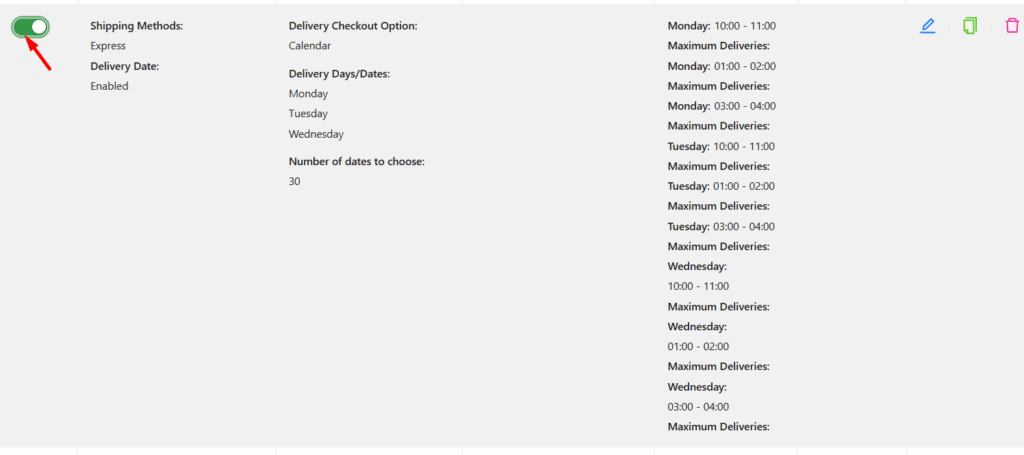
After saving the settings, the custom delivery schedule will appear in the list. Make sure to enable it, as shown below.
Frontend Experience: What Your Customers Will See #
After adding products to the cart, the customer can choose their preferred Shipping Method at checkout. Based on this, they’ll see only the delivery dates and times you’ve set for that method.
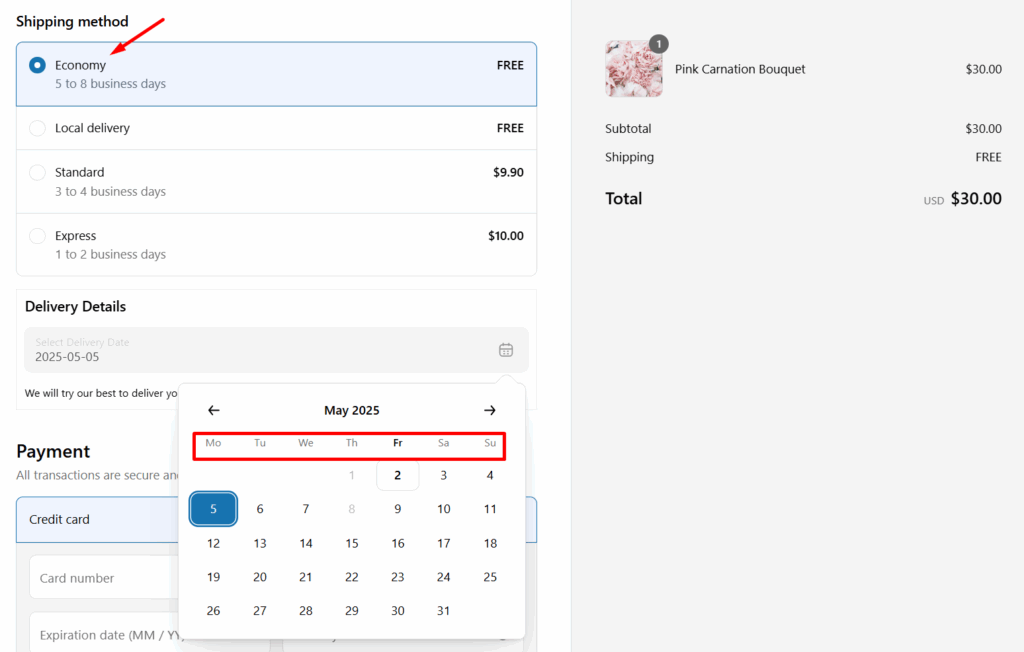
If any other shipping method is selected, the delivery schedule will be applied if the shipping method doesn’t have a custom delivery schedule created for it.
And that’s how you’ll be able to create your unique custom delivery schedule based on Shipping Methods!


