To add the delivery date and time fields on the cart, checkout, order status, and order confirmation page, we need to integrate the Flexi Delivery Date block into Shopify’s theme editor. Follow the steps below to add the delivery fields on your store’s frontend.
Add Delivery Fields to Shopify’s Cart Page #
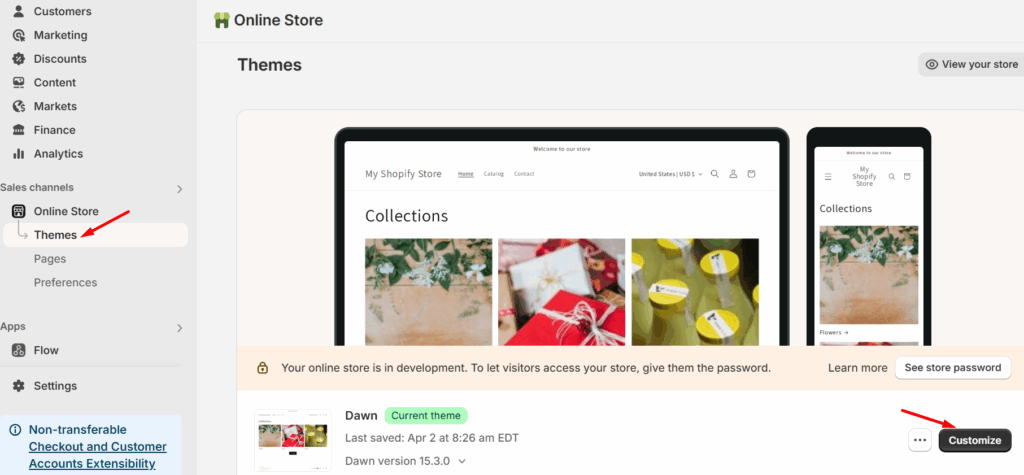
- Go to your Shopify Admin and click Online Store > Themes > Customize to open the theme editor.
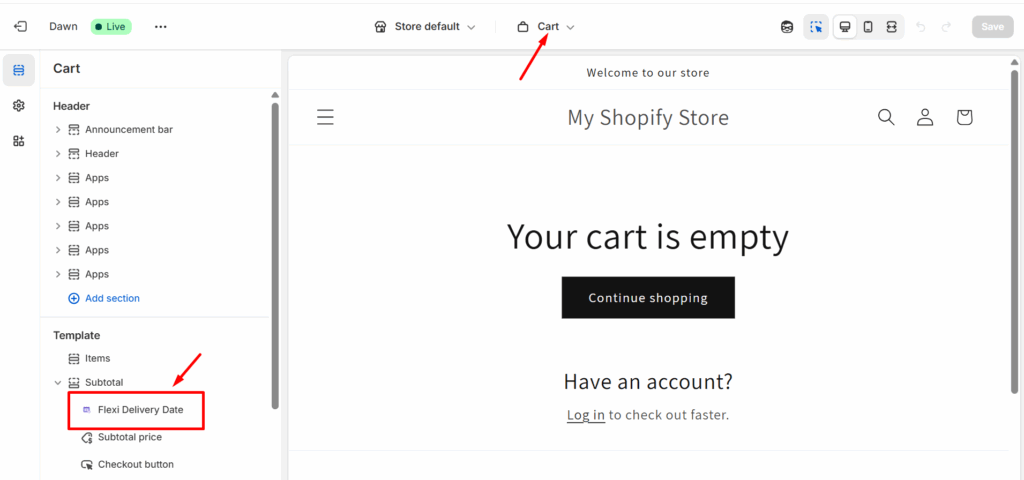
- In the theme editor, navigate to the Cart Page.
- On the left sidebar, under the Templates section, scroll to where the Subtotal block is listed.
- Click the + Add Block icon.
- From the popup, select Apps > Flexi Delivery Date block.
- Once added, click Save to apply the changes.
Frontend Experience #
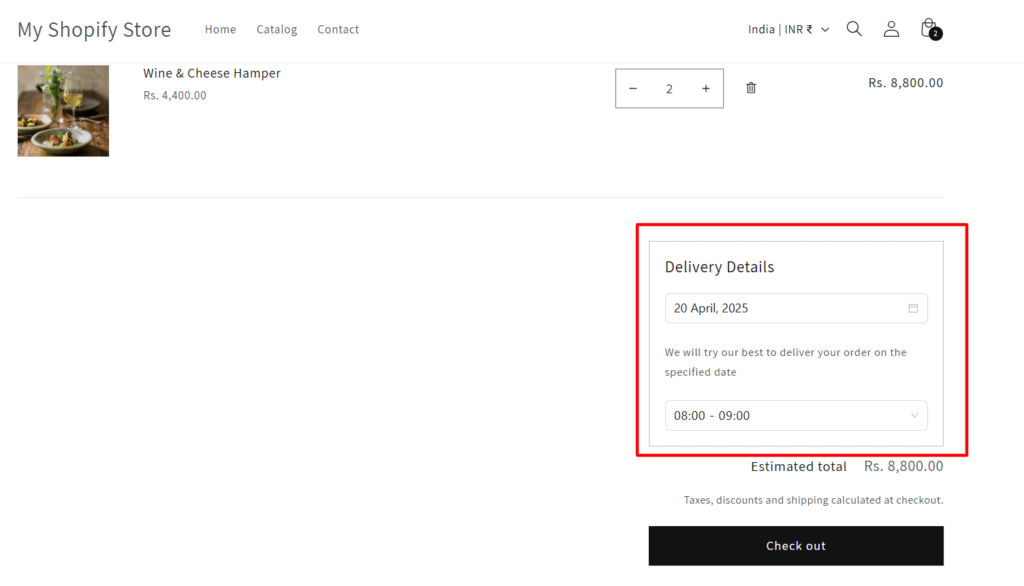
Once the Flexi Delivery Date block is added and saved in the Cart Page template, customers will see a new Delivery Date & Time Slot field directly on the cart page.
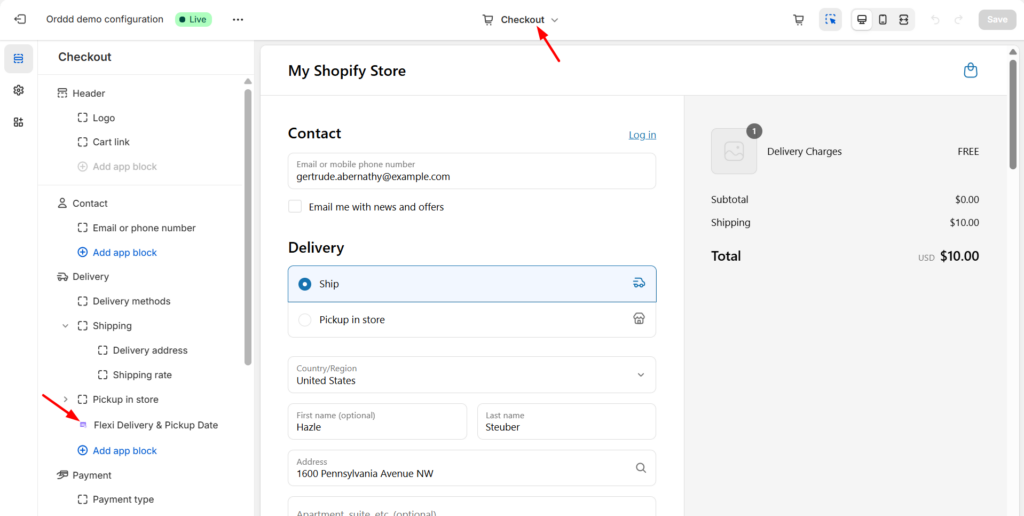
Add Delivery Fields to Shopify’s Checkout Page (available only for Shopify Plus plans) #
- Open the theme editor via Online Store > Themes > Customize.
- Once the Theme Editor opens, locate the dropdown at the top center of the page. Click the dropdown and select Checkout from the list of page types.
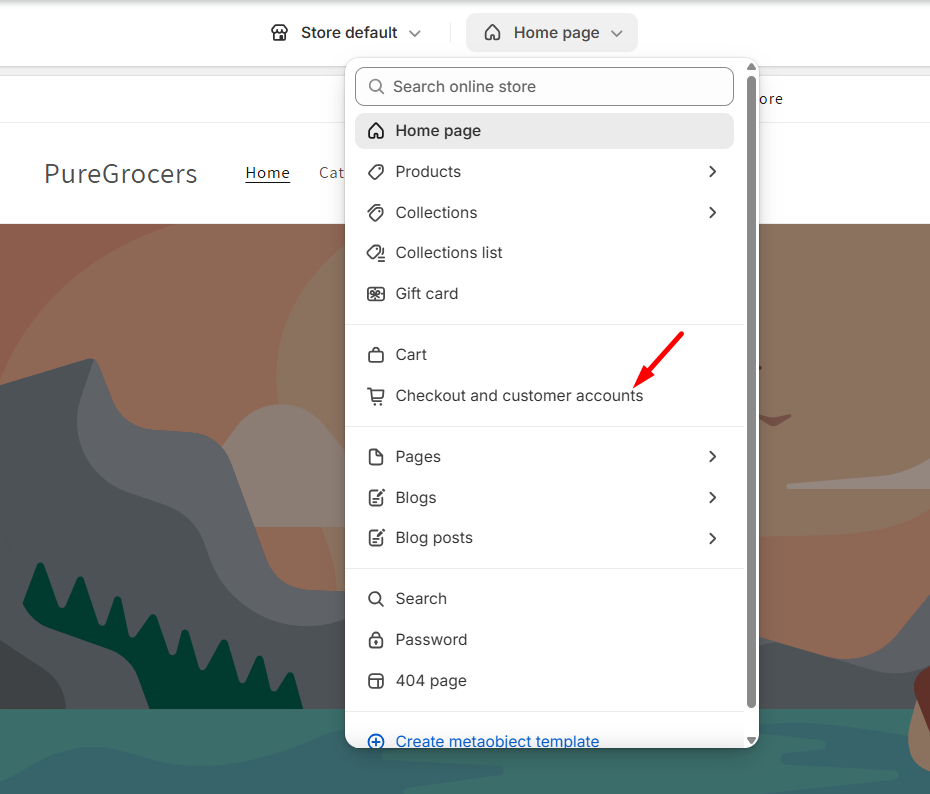
- The editor will now display the Checkout page layout. On the left sidebar, choose the section where you’d like to display the delivery fields.
For example, you can select the Contact section or any other preferred section to add the delivery block field. - Click Add App Block and select the Flexi Delivery Date block from the popup.
- Click Save to confirm your changes.
Frontend Experience #
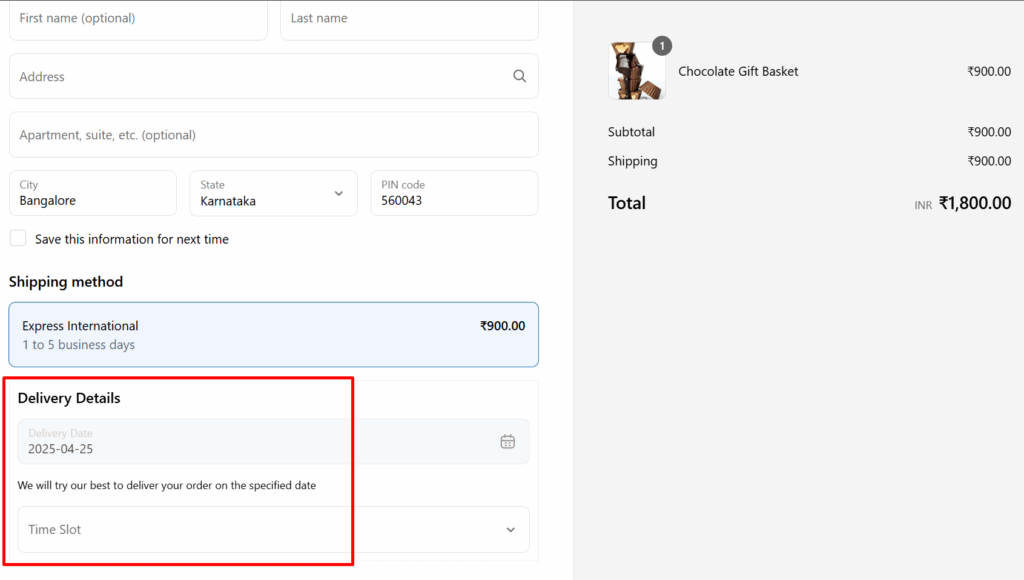
Once the Flexi Delivery Date block is added to the Checkout Page, a Delivery Date & Time Slot field will be displayed to customers within the specified checkout section.
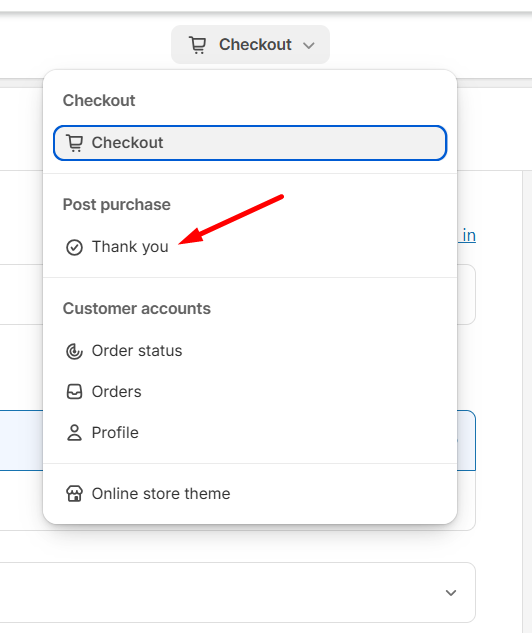
Add Delivery Fields to Shopify’s Thank You Page #
- Open the theme editor via Online Store > Themes > Customize.
- In the Theme Editor, select Checkout and Customer Accounts from the top dropdown.
- On the Checkout and Customer Accounts page, click the dropdown again and select the Thank You Page under the Post-purchase pages section.
- On the left sidebar, scroll down to the Order Details section and click + Add App Block.
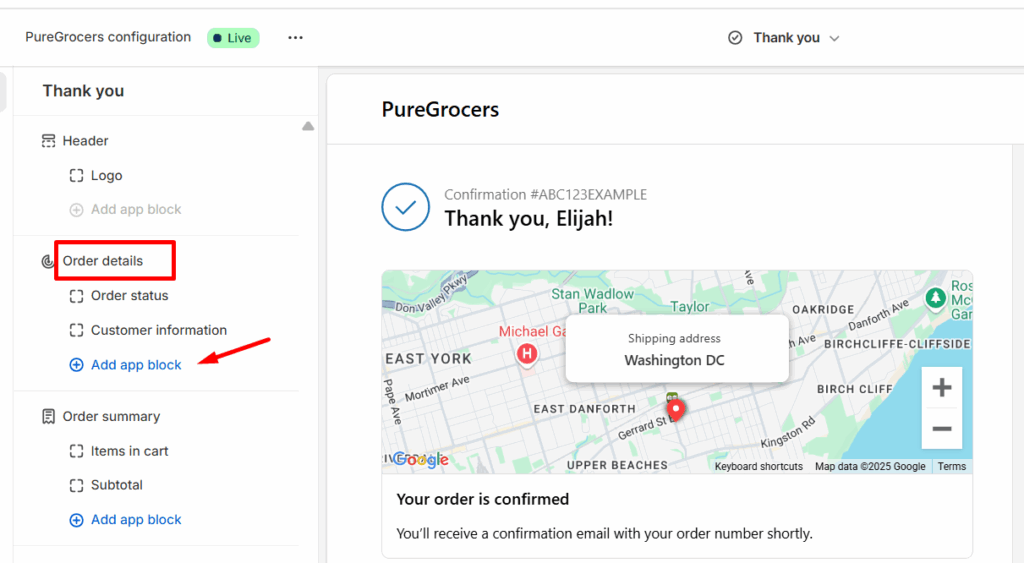
- Select the Flexi Delivery Date block from the pop-up that appears.
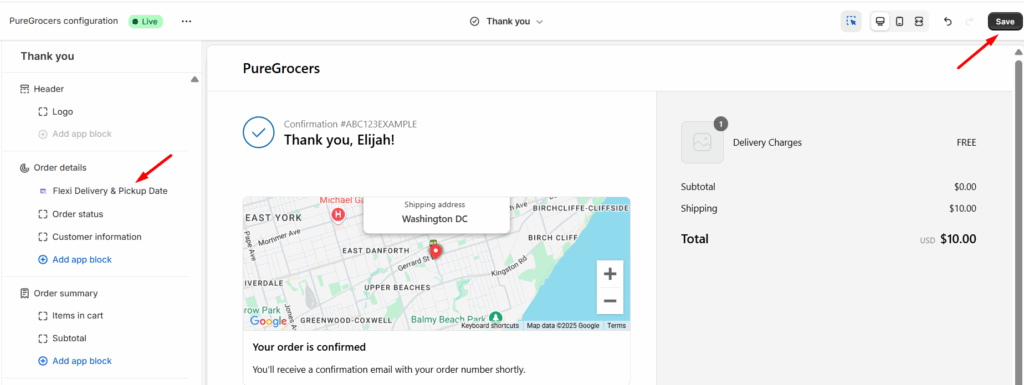
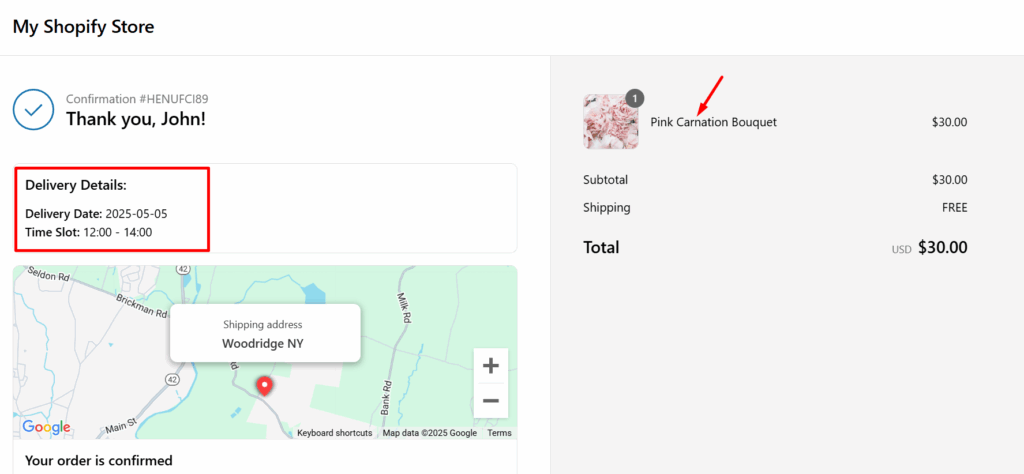
- The delivery details will now appear below the order details section. Click Save to apply the changes.
Frontend Experience #
By adding the Flexi Delivery Date block, customers will see their selected delivery preferences, including the Delivery Date and Time Slot, displayed clearly on the Thank You Page under the order confirmation section.
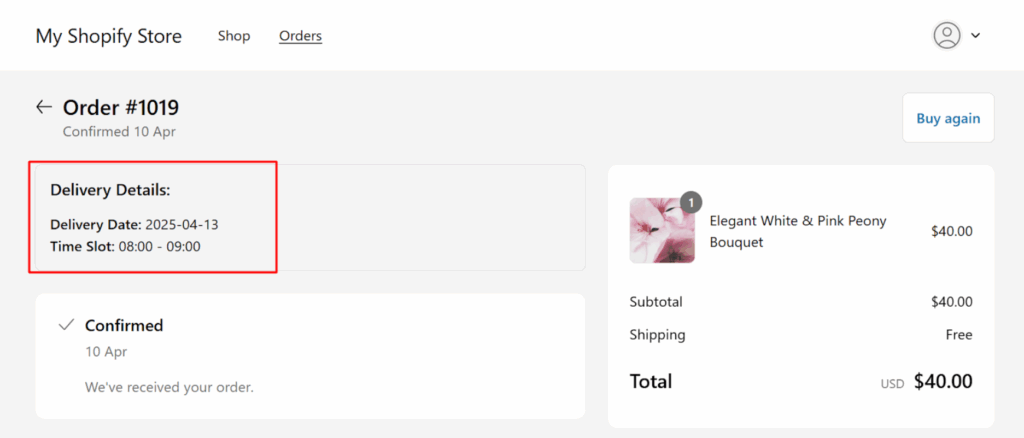
Add Delivery Fields to Shopify’s Order Status Page
#
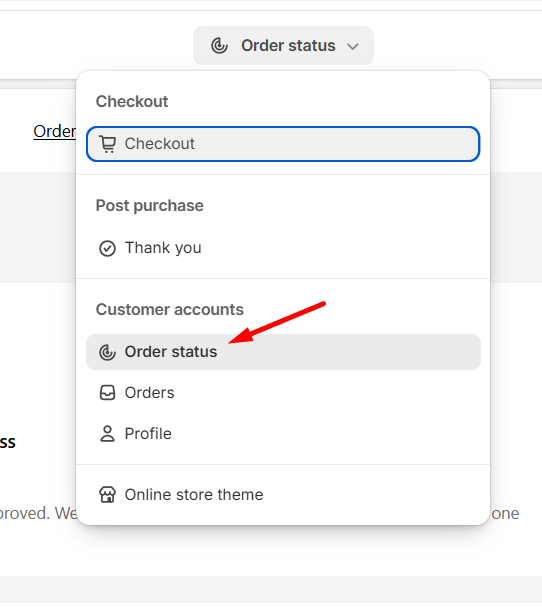
- Open the theme editor via Online Store > Themes > Customize.
- In the Theme Editor, select Checkout and Customer Accounts from the top dropdown.
- On the Checkout and Customer Accounts page, click the dropdown again and select the Order Status page.
- On the left sidebar, scroll down to the Order Status section and click + Add App Block.
- From the list of available app blocks, select Flexi Delivery Date.
- The delivery details will now appear below the order summary. Click Save to apply the changes.

- Once an order is placed, the delivery information will automatically appear on the Order Status page.
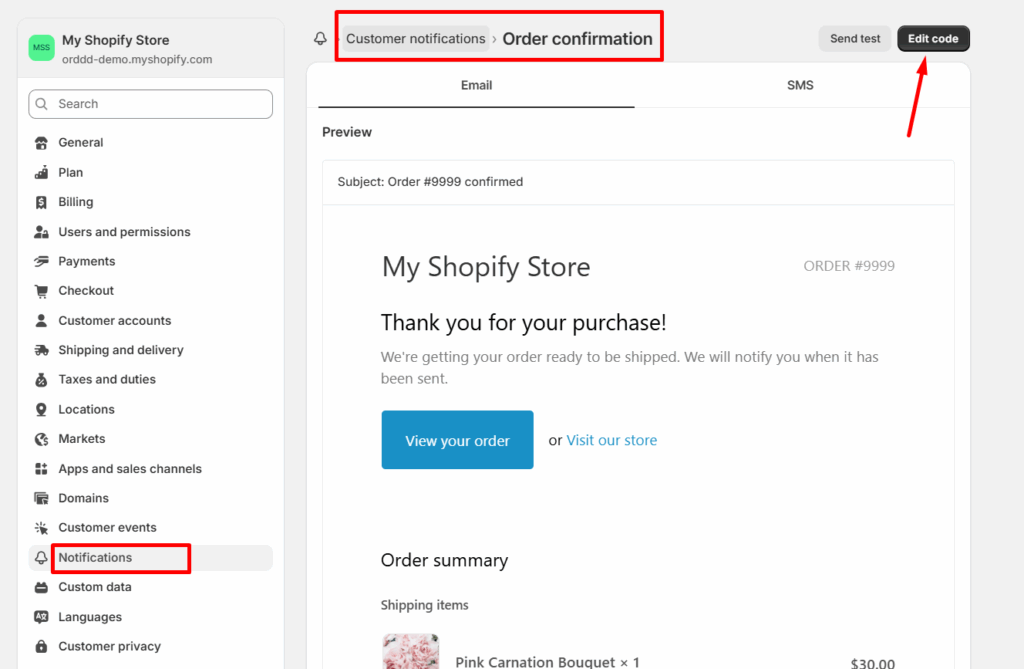
Show Delivery date and time on Email Notifications
#
To include delivery information in customer email notifications:
- From your Shopify admin, go to Settings > Notifications.
- Click on Customer Notifications, and then click Order Confirmation.
- Click Edit Code.
- Inside the HTML editor, look for the section starting with
<body>in your email template. You can insert the delivery details code snippet in your preferred location.
<table class="container">
   <tr>
     <td>
              <h3>Delivery Details</h3>
    </td>
   </tr>
  <tr>
    <td>{{ attributes["_date_label"] }}: {{attributes[attributes["_date_label"]] }}</td>
<td>{{ attributes["_time_slot_label"] }}: {{attributes["_time_slot"] }}</td>
  </tr>
</table>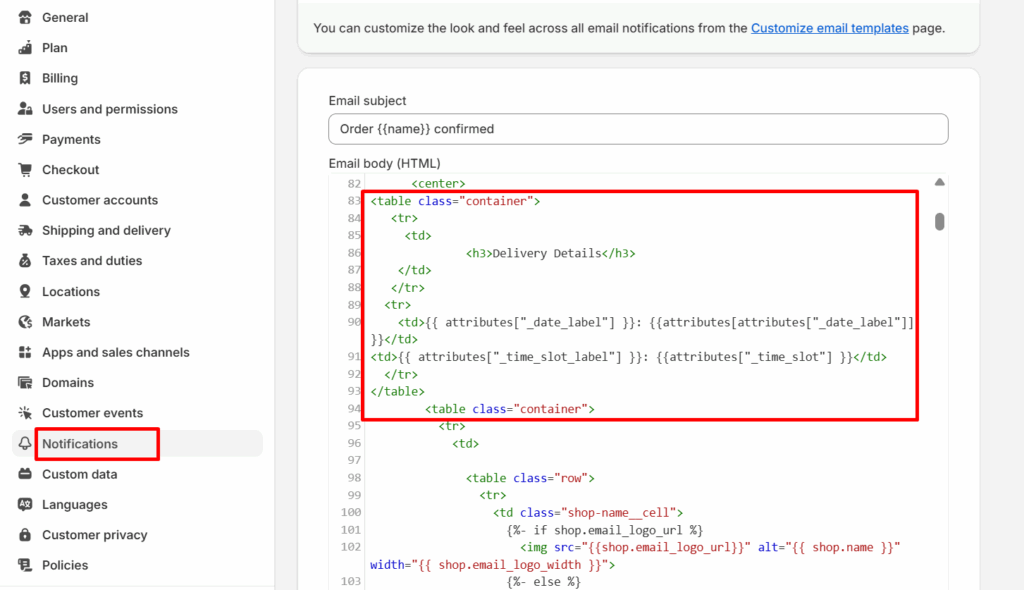
- Click Save.
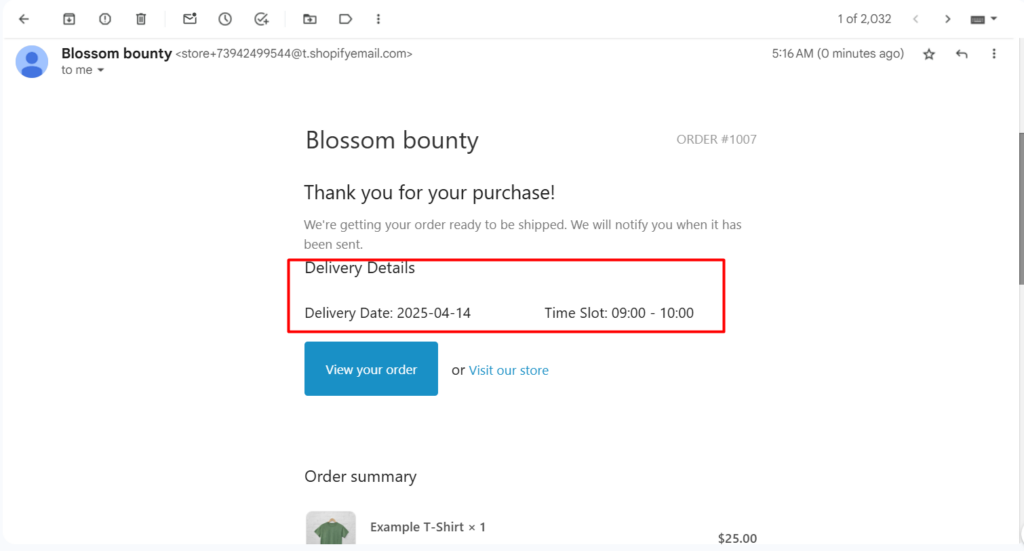
- When a customer places an order, the email notifications will have the delivery details in them as shown below.
Enable Admin to View and Edit Delivery Date & Time Details #
To allow Shopify store admins to view and edit delivery date and time details, follow these steps:
- Log in to your Shopify store’s backend.
- From the left-hand menu, click on Orders to access the list of all placed orders.
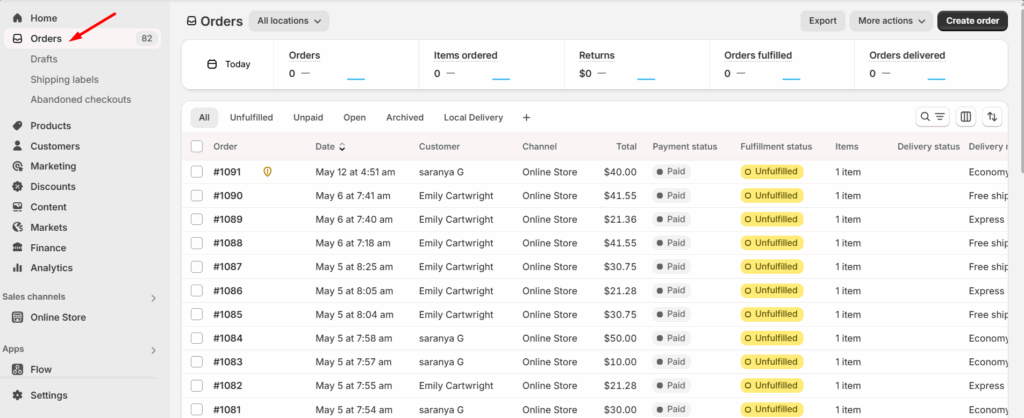
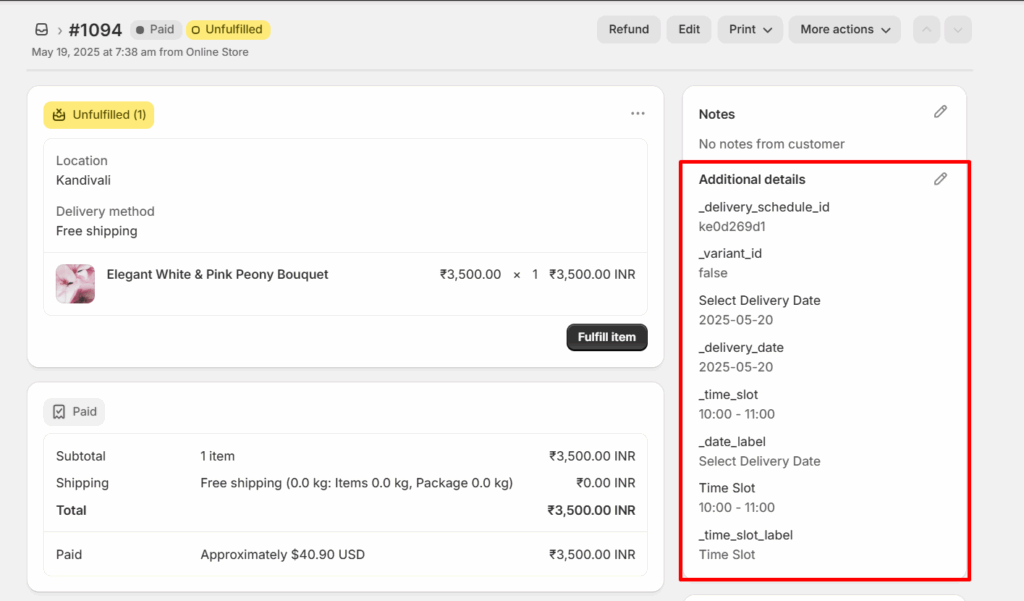
- Choose a single order from the list. On the Order Status Page, scroll to the right sidebar.
- You will find all custom delivery-related fields listed under Additional details. The admin can edit these delivery fields, and the changes will be reflected on the Order Page.
- On the top-right of the order details page, click on the More actions dropdown. From the dropdown, select View Order Status Page.
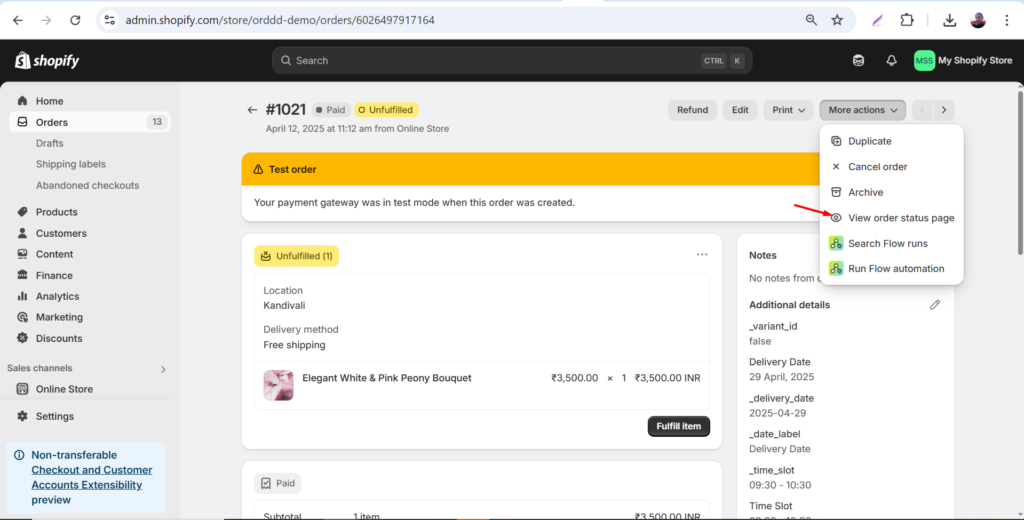
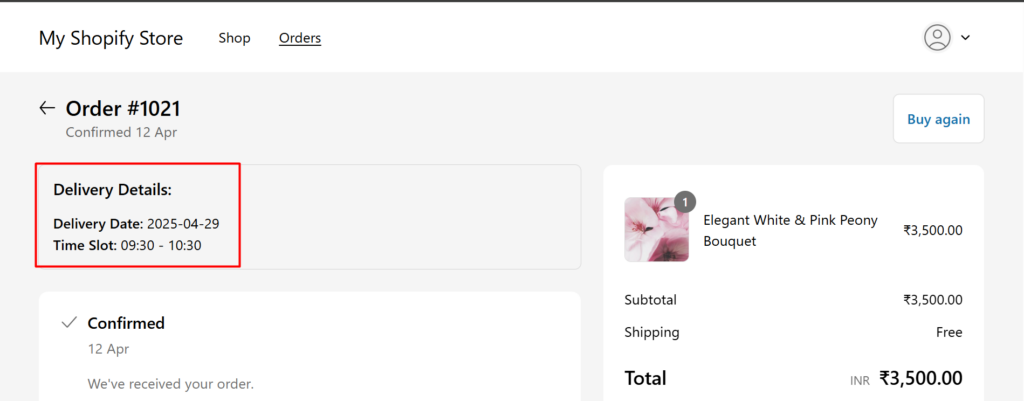
- This will redirect the admin to the Order Status Page, which displays the selected delivery date and time slot for the order.
By following the steps above, you can successfully display and manage delivery date and time fields across your Shopify store.


