Studio Six Apps

    • Knowledgebase
    • Sample Page
betterdocs-category-icon

Flexi Delivery & Pickup Date

37
  • Getting Started
    • Installation
    • Add Delivery Date & Time Fields to Shopify Templates
    • Import or Export Delivery Settings
  • Common Delivery Schedule Settings
    • Date Settings
      • How to show the estimated delivery date text?
      • How to add the maximum number of deliveries you can manage?
      • How to set a cut-off time for Same Day and Next Day deliveries?
      • How to set up preparation time for deliveries?
      • How to enable Delivery Days & Specific Delivery Dates?
    • Additional Settings of Custom Delivery Schedule
      • How Do Custom Delivery Schedules Work in Different Combinations?
      • How to prioritize custom delivery schedules?
      • How to Let Customers Choose Between Delivery and Pickup?
      • How to Create a Custom Delivery Schedule Based on Pickup Locations?
      • How to Create a Custom Delivery Schedule Based on Collections?
      • How to Create a Custom Delivery Schedule Based on Shipping Methods?
      • How to Create Custom Delivery Schedule Settings Based on Products?
    • Setting Up Delivery Time Slots
      • How to set up time slots for different weekdays and specific dates?
      • How to create additional charges for the ‘As Soon As Possible’ time slot option?
    • Weekday Based Delivery Schedule
      • Weekday Based Delivery Schedule
    • Additional Delivery Charges
      • How to Set Up Rush Delivery Charges Based on Urgency?
      • How to set a Minimum Order Amount for waiving delivery charges? 
      • How to set additional charges for Same Day & Next Day Delivery ?
    • Holidays
      • How do I block certain dates as Holidays?
  • Settings
    • Set Business Working Days
    • Block Time Slots
    • Common Schedule Settings
      • How to Set the Global Maximum Order Deliveries for Time Slots?
      • How to Apply the Default Delivery Schedule When No Priority is Set?
      • How to Use Global Maximum Orders per Day for Custom Settings?
      • How to add the maximum number of deliveries you can manage per product?
  • Appearance
    • Field Appearance
    • Calendar Appearance Settings
  • Order Listing
    • Order Listing
  • Delivery Calendar
    • How to Filter Order Deliveries in the Delivery Calendar?
    • View Orders by Day, Week, or Month
    • Order Display
  • Pricing
    • Pricing Plans & Upgrade Options
  • FAQs
    • FAQs & Troubleshooting Guide
  • Uninstall the App
    • Uninstall the App
  • Home
  • Docs
  • Flexi Delivery & Pickup Date
  • Appearance
  • Calendar Appearance Settings

Calendar Appearance Settings

Table Of Contents
  • Date Format
    • Frontend Experience: What Your Customers Will See
  • Time Format
    • Frontend Experience: What Your Customers Will See

The Calendar Appearance Settings give store owners precise control over how date and time inputs are displayed to customers

In this guide, we’ll walk you through how to set the date and time format to match your store’s preferences.

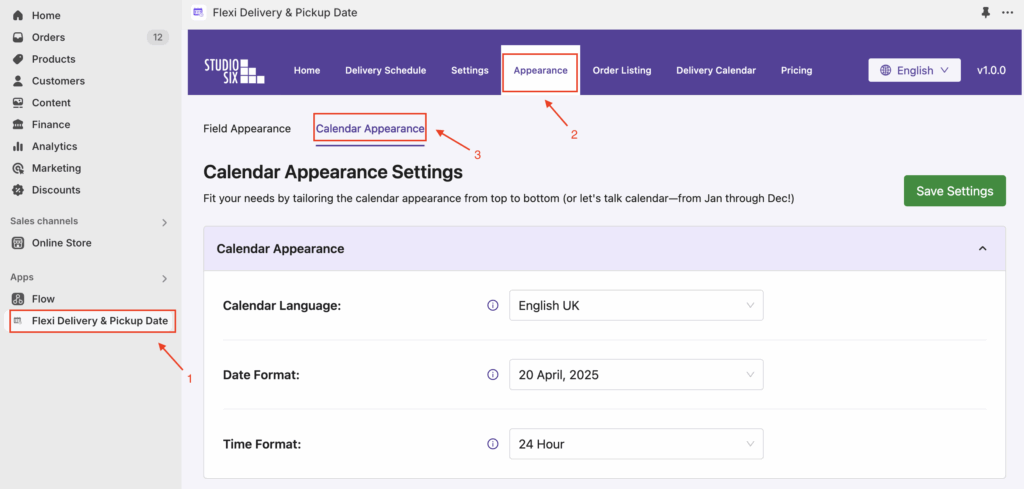
  • Navigate to Apps > Flexi Delivery & Pickup Date > Appearance, then select the Calendar Appearance sub-tab
Date Format #

Date format preferences differ by region. This setting allows you to adjust the calendar to match the standard date format of your country.

For example,

  • France, dd-mm-yyyy date format is used
  • Germany: dd.mm.yyyy

You can choose the appropriate format from the Date Format dropdown to ensure the calendar displays dates in a way that your customers are familiar with.
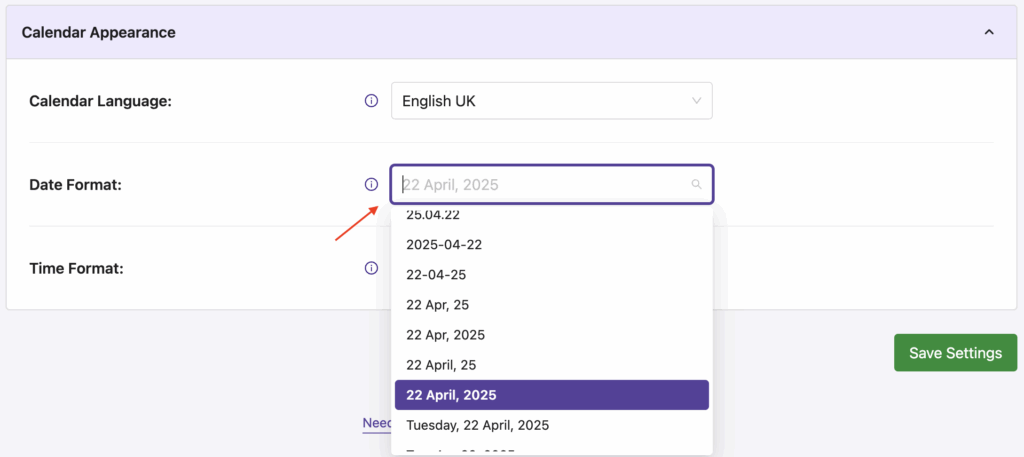

Note: On the Checkout page, the date format only applies when using the inline calendar due to Shopify’s limitations.
On the cart page, the selected format displays correctly without any issues.

Frontend Experience: What Your Customers Will See #

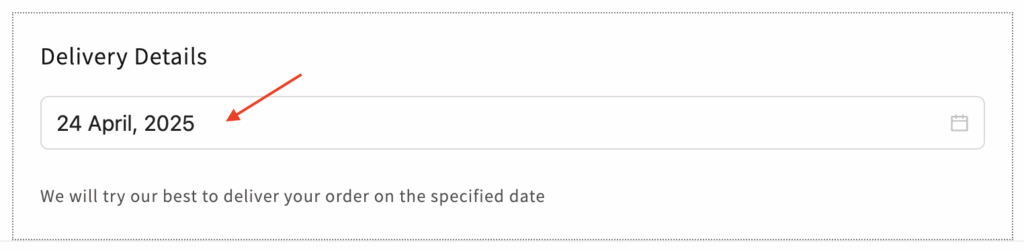
Cart Page
The selected date format will be displayed in the Delivery Date field on the Cart page.
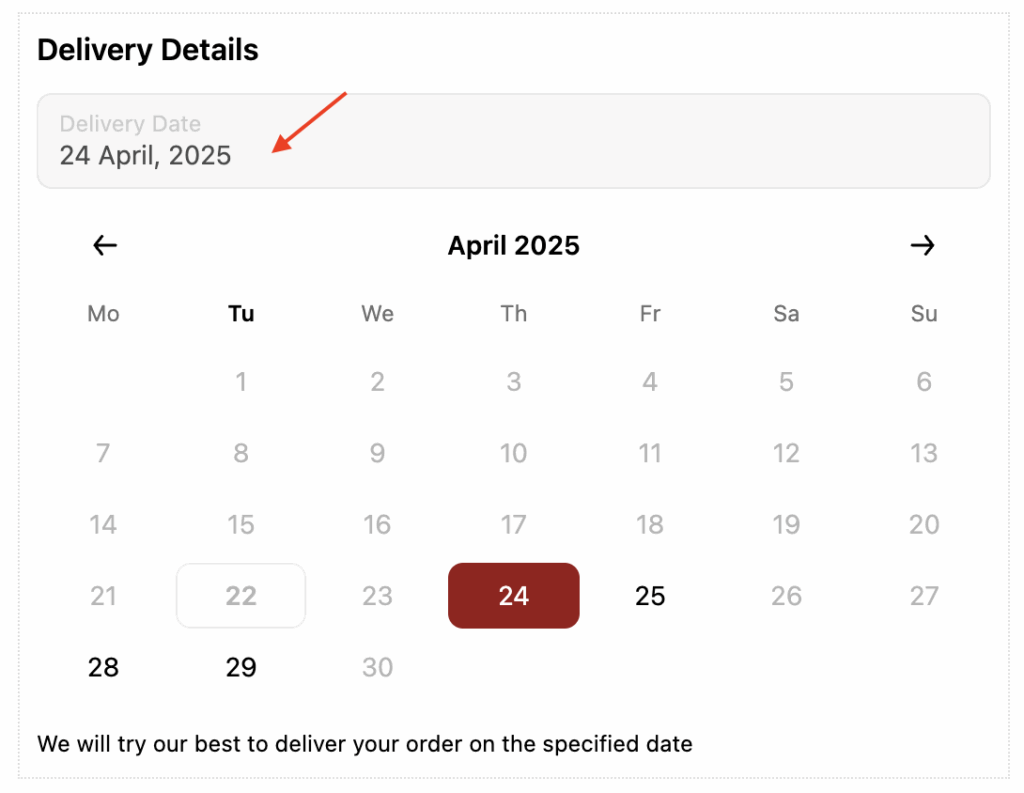
Checkout page

On the Checkout page, the date format will only apply when using the inline calendar
Time Format #

Depending on the region, customers may use either the 12-hour or 24-hour time format. The time format dropdown allows you to select the appropriate time format for your store’s customer base.

  • 12-Hour Format:
    Displays time with AM/PM suffix.
    Example: 2:00 PM
  • 24-Hour Format (Default):
    Shows full range from 00:00 to 23:59.
    Example: 13:00 to 23:00
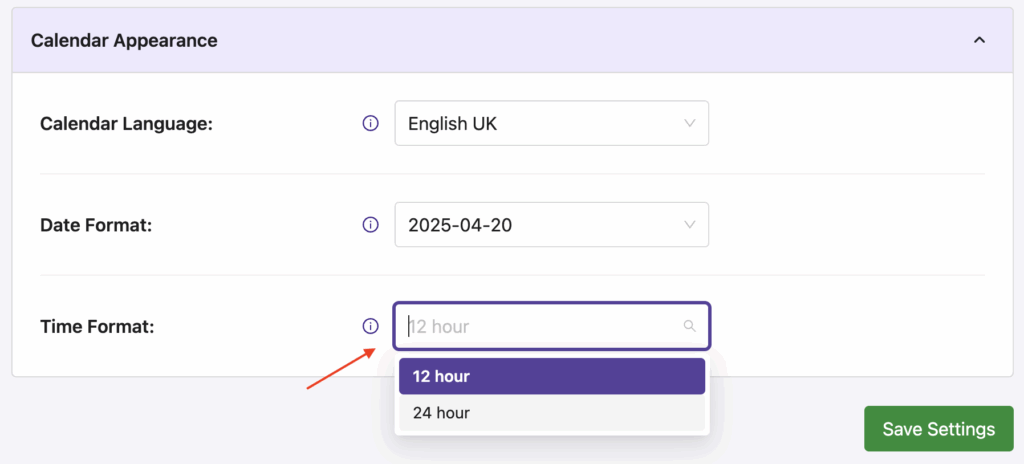
Frontend Experience: What Your Customers Will See #

Your chosen time format will be reflected in all time slots visible to the customer on both the cart and checkout pages.
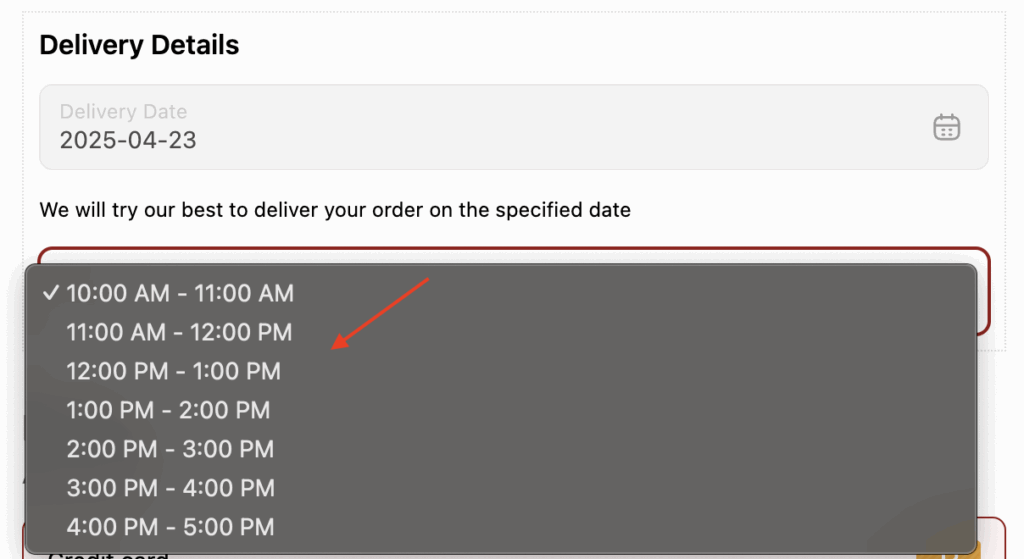
These settings help ensure your delivery calendar is consistent, user-friendly, and aligned with your store’s regional preferences.

What are your feelings
Share This Article:
  • Facebook
  • X
  • LinkedIn
  • Pinterest
Updated on May 12, 2025

Studio Six Apps

  • Blog
  • About
  • FAQs
  • Authors
  • Events
  • Shop
  • Patterns
  • Themes

Twenty Twenty-Five

Designed with WordPress